Part 5: Deploying the contract
So far you have used the token in the SmartPy test scenario and in the Octez client local sandbox. To test it on a live network, you can use the Ghostnet test network.
For more information about testnets, see Testing on sandboxes and testnets.
Configuring the Octez client for Ghostnet
Follow these steps to set up your installation of the Octez client to work with Ghostnet:
-
Go to https://teztnets.com/ghostnet-about and copy the URL of a public RPC node for Ghostnet, such as https://rpc.ghostnet.teztnets.com.
-
Use that URL to configure the Octez client in this command:
octez-client -E https://rpc.ghostnet.teztnets.com config update -
If you don't have an account on Ghostnet, create or import one with the instructions in Creating accounts.
-
Use the Ghostnet faucet to get some tez for the account.
Setting the admin account in the contract
Currently, the admin account in the contract is an automatically-generated account. Follow these steps to use your account as the admin account instead:
-
Compile the contract with the
pythoncommand as you did in previous steps. -
Get the address of your account by running this command:
octez-client list known addresses -
Update the
step_003_cont_0_storage.tzfile and replace the first address listed with your account. This is the field that stores the admin account in the contract storage. -
Deploy the contract to Ghostnet by passing your account alias, the compiled contract, and initial storage value to the
originate contractcommand. For example, if your account is namedmy_accountand the compiled files are in thefa2_lib_fungiblefolder, the command looks like this:octez-client originate contract smartpy_fa2_fungible \
transferring 0 from my_account \
running fa2_lib_fungible/step_003_cont_0_contract.tz \
--init "$(cat fa2_lib_fungible/step_003_cont_0_storage.tz)" --burn-cap 3 --force -
Copy the address of the contract from the output of the command. The contract address starts with
KT1. -
Look up the contract on the block explorer Better Call Dev
Note that the block explorer recognizes that the contract is FA2-compliant and shows an FA2 icon at the top of the page. The block explorer also shows information about the tokens on the Tokens tab.
-
Mint some tokens and send them to your account from the Interact tab. For example, to mint tokens of an existing token type, click Add, select
existingfor the transaction, and specify your address and the number of tokens to create, as in this picture: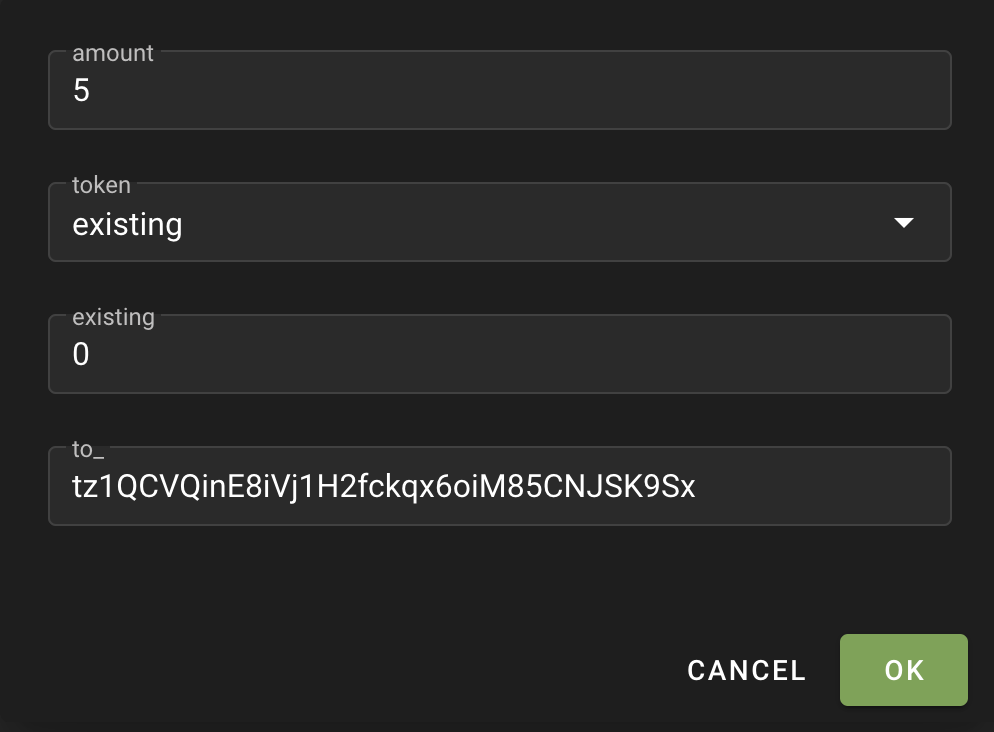
Interact with the token in a wallet
Because the token is FA2-compliant, wallet applications can work with it directly. However, you must add the token contract to your wallet for it to recognize the token.
The process for adding a token contract to a wallet depends on the wallet application. Here are steps for the Temple wallet:
-
Copy the address of the contract. You can use the command
octez-client list known contractsto print the addresses of contracts that the Octez client knows about. -
Open the Temple wallet and sign in.
-
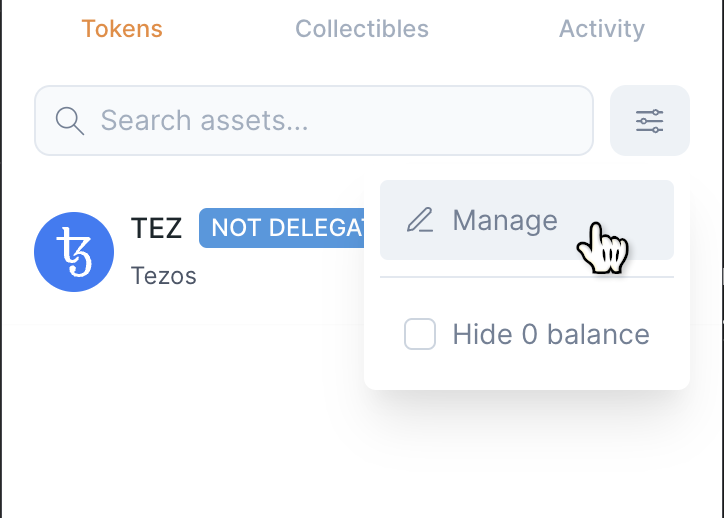
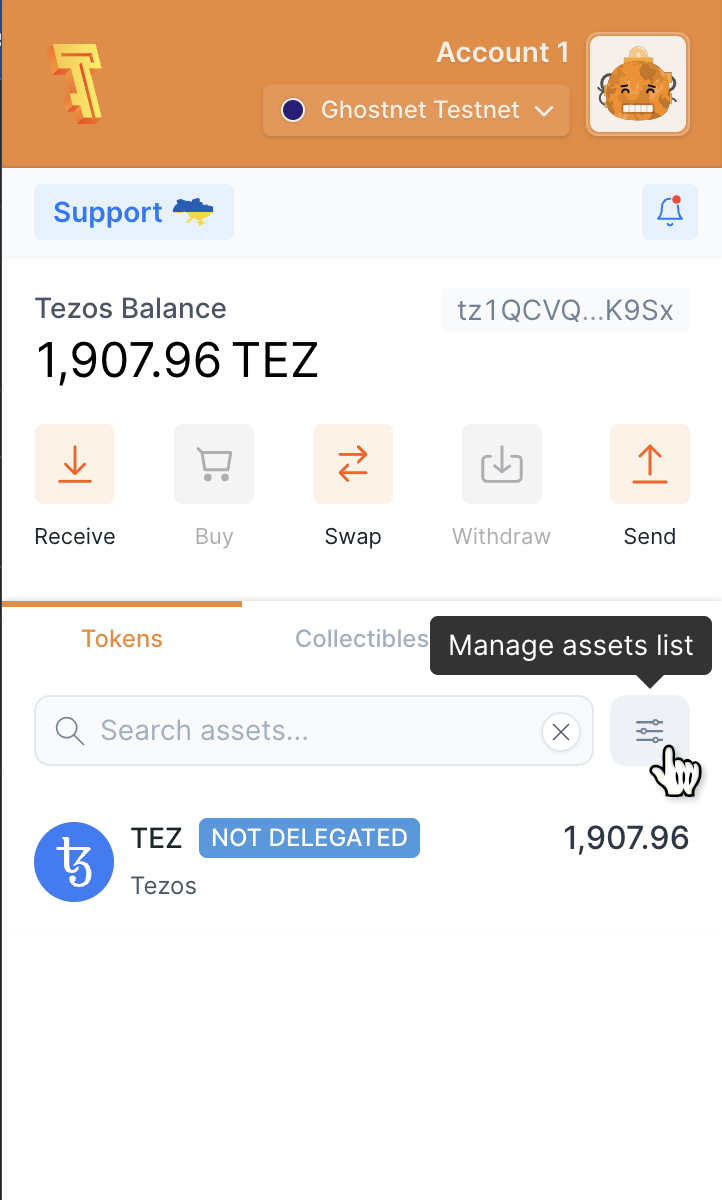
Under the list of tokens, click Manage assets list:

-
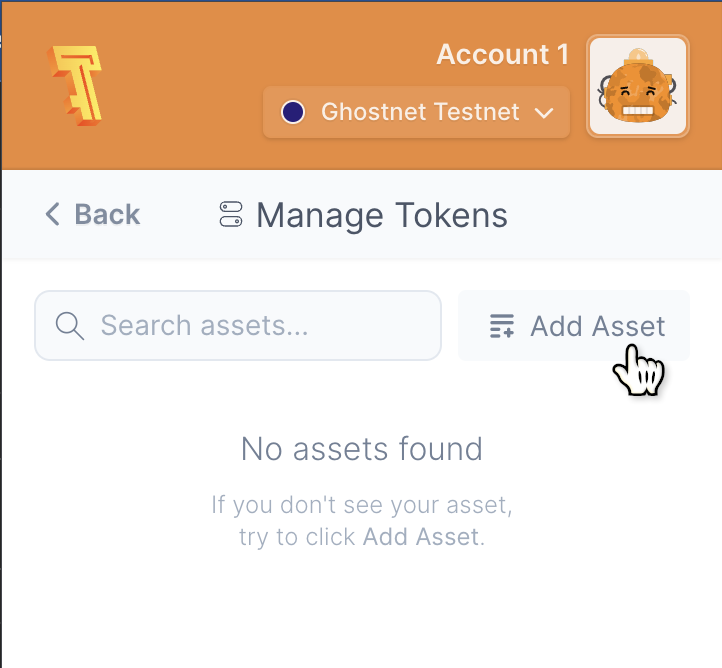
From the popup window, click Manage:
-
Click Add Asset:
-
In the window that opens add information about the token, including the contract address, the token ID (such as 0 or 1), and the the symbol for the token, such as
TOK0: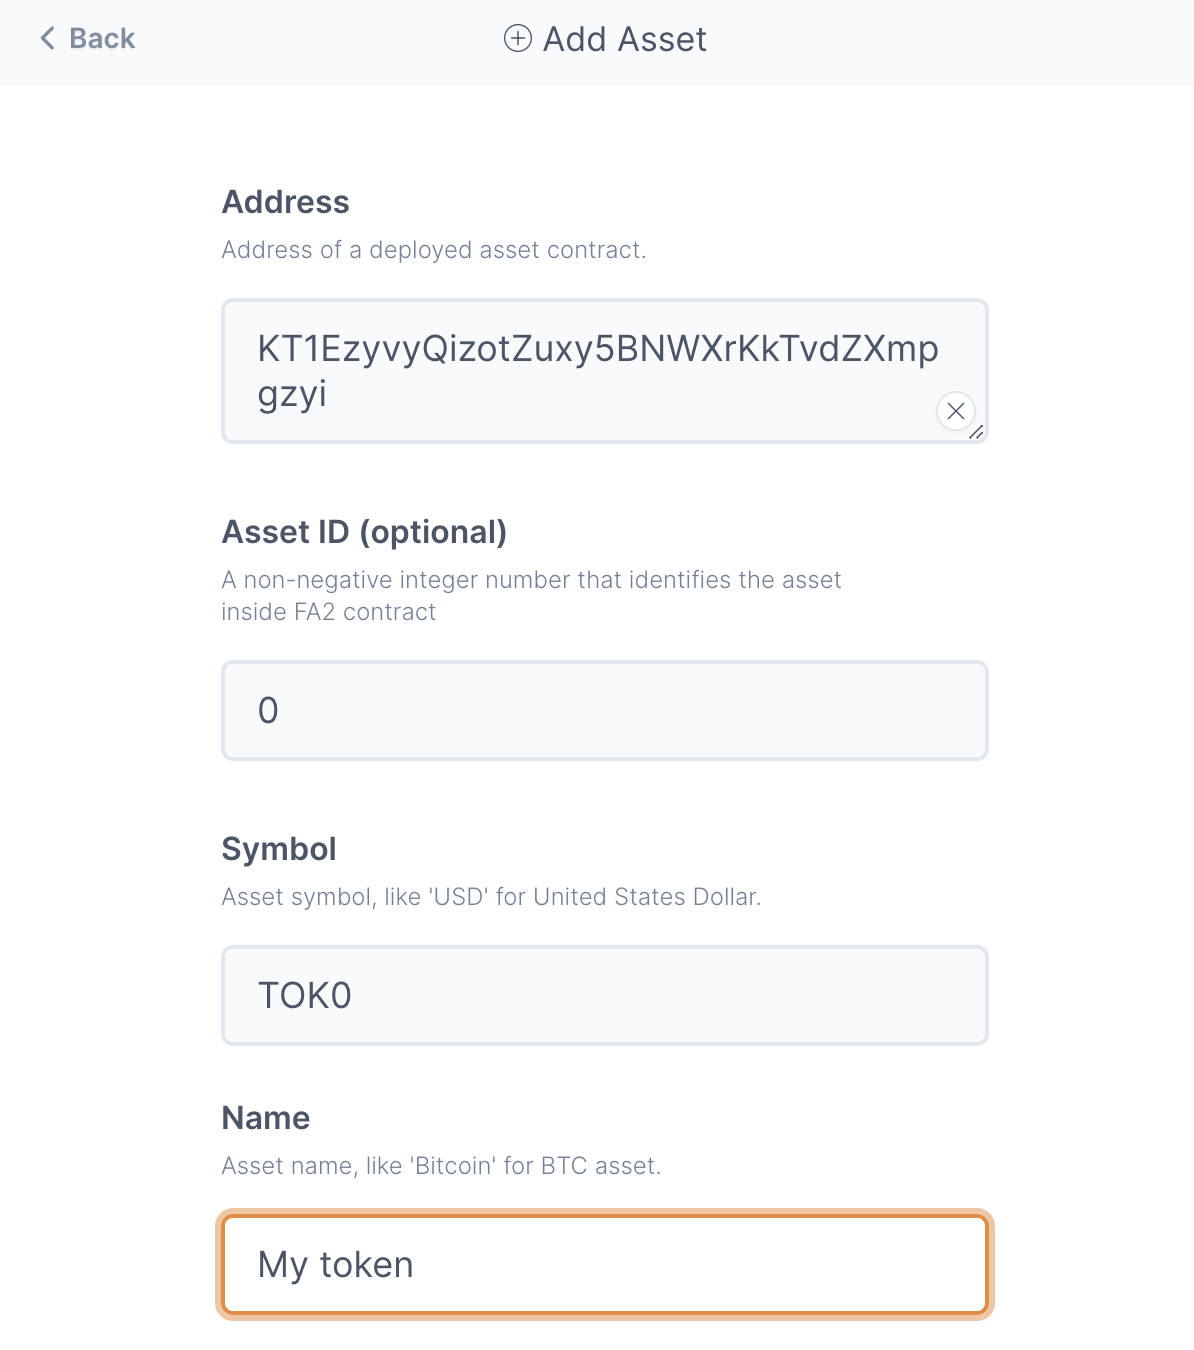
-
Click Add Asset.
Now the token appears in your wallet just like any other token:
From here, you can run transactions on the token, such as sending it to a different account.
Next steps
Now that you have an FA2-compliant token, you can use it with all kinds of Tezos dApps. If you want to continue working with the token, here are some ideas:
- Implement an exchange rate for the
convertentrypoint - Implement other custom behaviors for your token while keeping it FA2-compliant
- Build a front-end application to make it easier to interact with it
- Add other token types and metadata for them
- Try creating a single asset contract or an NFT contract with the SmartPy FA2 library